Multiecuscan - パソコン用
バイ FESSoft Ltd.
- カテゴリ: Utilities
- 最終更新日: 2023-12-11
- 現在のバージョン: 2.3
- ファイルサイズ: 96.71 MB
- 互換性: Windows PC 10, 8, 7 + MAC
バイ FESSoft Ltd.


あなたのWindowsコンピュータで Multiecuscan を使用するのは実際にはとても簡単ですが、このプロセスを初めてお使いの場合は、以下の手順に注意する必要があります。 これは、お使いのコンピュータ用のDesktop Appエミュレータをダウンロードしてインストールする必要があるためです。 以下の4つの簡単な手順で、Multiecuscan をコンピュータにダウンロードしてインストールすることができます:
エミュレータの重要性は、あなたのコンピュータにアンドロイド環境をエミュレートまたはイミテーションすることで、アンドロイドを実行する電話を購入することなくPCの快適さからアンドロイドアプリを簡単にインストールして実行できることです。 誰があなたは両方の世界を楽しむことができないと言いますか? まず、スペースの上にある犬の上に作られたエミュレータアプリをダウンロードすることができます。
A. Nox App または
B. Bluestacks App 。
個人的には、Bluestacksは非常に普及しているので、 "B"オプションをお勧めします。あなたがそれを使ってどんなトレブルに走っても、GoogleやBingで良い解決策を見つけることができます(lol).
Bluestacks.exeまたはNox.exeを正常にダウンロードした場合は、コンピュータの「ダウンロード」フォルダまたはダウンロードしたファイルを通常の場所に保存してください。
見つけたらクリックしてアプリケーションをインストールします。 それはあなたのPCでインストールプロセスを開始する必要があります。
[次へ]をクリックして、EULAライセンス契約に同意します。
アプリケーションをインストールするには画面の指示に従ってください。
上記を正しく行うと、ソフトウェアは正常にインストールされます。
これで、インストールしたエミュレータアプリケーションを開き、検索バーを見つけてください。 今度は Multiecuscan を検索バーに表示し、[検索]を押します。 あなたは簡単にアプリを表示します。 クリック Multiecuscanアプリケーションアイコン。 のウィンドウ。 Multiecuscan が開き、エミュレータソフトウェアにそのアプリケーションが表示されます。 インストールボタンを押すと、アプリケーションのダウンロードが開始されます。 今私達はすべて終わった。
次に、「すべてのアプリ」アイコンが表示されます。
をクリックすると、インストールされているすべてのアプリケーションを含むページが表示されます。
あなたは アイコンをクリックします。 それをクリックし、アプリケーションの使用を開始します。
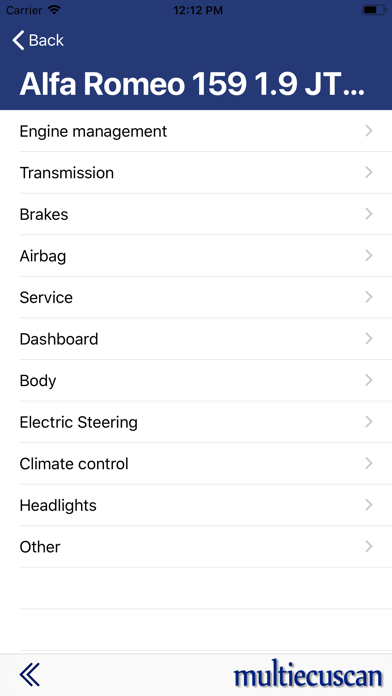
Multiecuscan is a dealer level diagnostic tool for most models of Fiat, Alfa Romeo and Lancia vehicles and also covers some models of Jeep, Chrysler, Dodge and Suzuki. We also have support for some Ducati bike models. Please visit our web site for a full list of covered models. The functionality includes: - Fault code reading and clearing - Live sensor data - Live data graphical view - Actuator testing - Reset/programming functions - PROXI configuration - Service Reminder reset - Generic EOBD vehicle diagnostics REQUIREMENTS: An OBD interface is required for connection to vehicles. Without interface it is possible to run connection in "simulation" mode and explore the available functionality. We currently support CANtieCAR v4.x WiFi, CANtieCAR v5.x BLE/WiFi, ELM327 WiFi, OBDLink MX WiFi, OBDLink MX+ Bluetooth, Vgate vLinker WiFi, Vgate vLinker BLE interfaces. Please note that some procedures (like PROXI alignment) depend on the interface speed and may not complete successfully with some interfaces. IN-APP PURCHASE: The full functionality of the App requires subscription which can be purchased as in-app purchase. Without subscription the App will run with limited functionality. Please note that the Multiecuscan iOS version is completely separate from Multiecuscan for Windows. The iOS version can be purchased only from the App Store and it is not linked to the license for the Windows' version. It is not possible to transfer license between iOS and Windows. If you already have purchased the full version on another iOS device then click the RESTORE PURCHASES button to activate the full version. NOTE: We are a 3rd party supplier and this is not an official factory tool for the above mentioned brands. The brand names are listed only as reference.
Buggy cannot select ELM3 27 WiFi device
I have a PLX Kiwi 3 interface that is WiFi and Bluetooth capable. I’m able to connect to my Alfa Romeo Giulia with OBD Fusion and DashCmd apps on my iPhone no problem. But I’m unable to connect with this multiecuscan app. When I go open the app and go to settings I select Interface Type: ELM 327 WiFi it shows that it has been selected but if I click on Interface Type again it shows that OBDLink MX+ Bluetooth has actually been selected. This is a glitch. Also, in iOS Settings > Multiecuscan > Multiecuscan Settings it shows the same options as the in-app settings but nothing happens when you select changes. Then changes are not reflected in the app itself. Totally unusable for me. App needs more development.