Jellyfish Music Player - パソコン用
バイ TeleStar LTD
- カテゴリ: Music
- 最終更新日: 2017-10-09
- 現在のバージョン: 2.0
- ファイルサイズ: 5.75 MB
- 互換性: Windows PC 10, 8, 7 + MAC
バイ TeleStar LTD
あなたのWindowsコンピュータで Jellyfish Music Player を使用するのは実際にはとても簡単ですが、このプロセスを初めてお使いの場合は、以下の手順に注意する必要があります。 これは、お使いのコンピュータ用のDesktop Appエミュレータをダウンロードしてインストールする必要があるためです。 以下の4つの簡単な手順で、Jellyfish Music Player をコンピュータにダウンロードしてインストールすることができます:
エミュレータの重要性は、あなたのコンピュータにアンドロイド環境をエミュレートまたはイミテーションすることで、アンドロイドを実行する電話を購入することなくPCの快適さからアンドロイドアプリを簡単にインストールして実行できることです。 誰があなたは両方の世界を楽しむことができないと言いますか? まず、スペースの上にある犬の上に作られたエミュレータアプリをダウンロードすることができます。
A. Nox App または
B. Bluestacks App 。
個人的には、Bluestacksは非常に普及しているので、 "B"オプションをお勧めします。あなたがそれを使ってどんなトレブルに走っても、GoogleやBingで良い解決策を見つけることができます(lol).
Bluestacks.exeまたはNox.exeを正常にダウンロードした場合は、コンピュータの「ダウンロード」フォルダまたはダウンロードしたファイルを通常の場所に保存してください。
見つけたらクリックしてアプリケーションをインストールします。 それはあなたのPCでインストールプロセスを開始する必要があります。
[次へ]をクリックして、EULAライセンス契約に同意します。
アプリケーションをインストールするには画面の指示に従ってください。
上記を正しく行うと、ソフトウェアは正常にインストールされます。
これで、インストールしたエミュレータアプリケーションを開き、検索バーを見つけてください。 今度は Jellyfish Music Player を検索バーに表示し、[検索]を押します。 あなたは簡単にアプリを表示します。 クリック Jellyfish Music Playerアプリケーションアイコン。 のウィンドウ。 Jellyfish Music Player が開き、エミュレータソフトウェアにそのアプリケーションが表示されます。 インストールボタンを押すと、アプリケーションのダウンロードが開始されます。 今私達はすべて終わった。
次に、「すべてのアプリ」アイコンが表示されます。
をクリックすると、インストールされているすべてのアプリケーションを含むページが表示されます。
あなたは アイコンをクリックします。 それをクリックし、アプリケーションの使用を開始します。
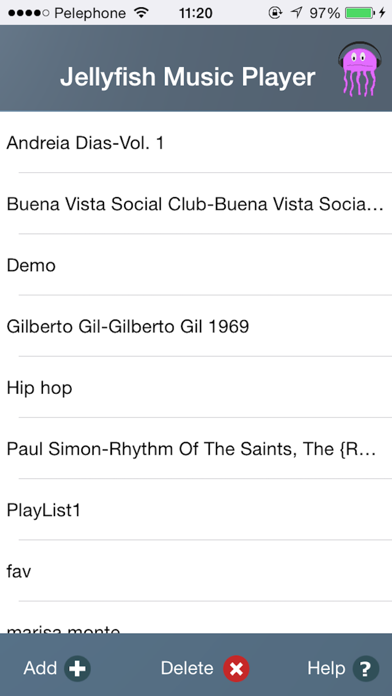
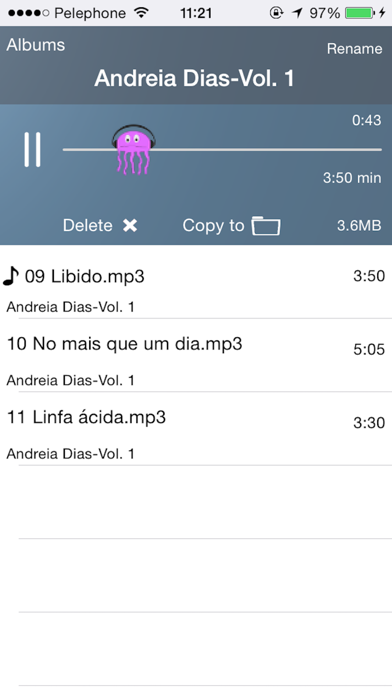
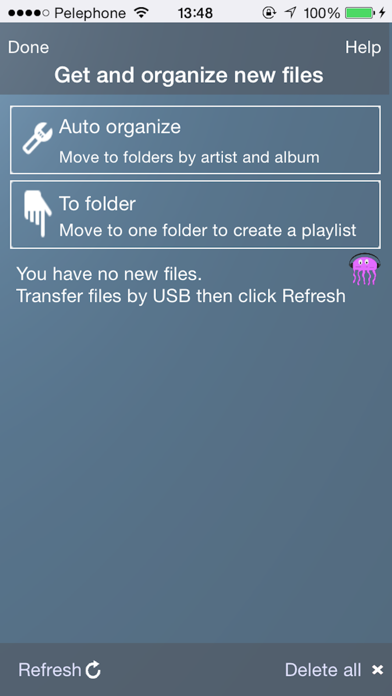
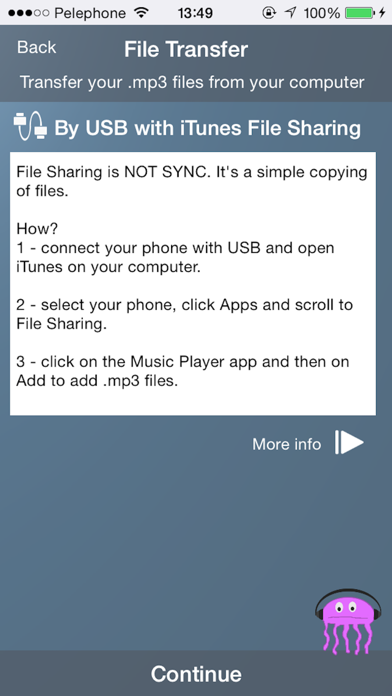
Do you have lots of music on your computer and would like to listen to it on your iPhone but find iTunes Sync uncomfortable to use? Jellyfish Music Player allows you to listen to your music files on your iPhone without using iTunes Sync. You can transfer your audio files from your computer using USB. How to use the app? To transfer your audio files from your computer you have to use iTunes 'File Sharing' feature. File Sharing is not sync!! with File Sharing you copy files from your computer directly to the app when you phone is connected via USB. Once the files are transferred to the app you can organize them in folders as you like. You listen to the files from the app itself like you use any other music player app. The app shows how much space is taken by each file and you can remove files and folders directly from the app to easily make space on your phone. How much does it cost? You can use the app free of charge for a trial period of 30 days. When the trial period is finished you can still listen to the music you have transferred to the app but cannot add new music. To add new files you need to buy an upgrade to the unlimited version of the app. Notes: - Only mp3 files are supported. - The files in the app cannot be played by Apple Music app and the app cannot play files transferred by iTunes sync. - You must legally own all the audio files that are transferred to the app.
Good
Perfect
Easily
better than alternatives like dropbox
Nice app
Waited so long for this
WoW
delete music directly from the phone!!
Thanks
love the design
Great app
So much better than sync