
あなたのWindowsコンピュータで DIY Anemometer (Wind Meter) を使用するのは実際にはとても簡単ですが、このプロセスを初めてお使いの場合は、以下の手順に注意する必要があります。 これは、お使いのコンピュータ用のDesktop Appエミュレータをダウンロードしてインストールする必要があるためです。 以下の4つの簡単な手順で、DIY Anemometer (Wind Meter) をコンピュータにダウンロードしてインストールすることができます:
エミュレータの重要性は、あなたのコンピュータにアンドロイド環境をエミュレートまたはイミテーションすることで、アンドロイドを実行する電話を購入することなくPCの快適さからアンドロイドアプリを簡単にインストールして実行できることです。 誰があなたは両方の世界を楽しむことができないと言いますか? まず、スペースの上にある犬の上に作られたエミュレータアプリをダウンロードすることができます。
A. Nox App または
B. Bluestacks App 。
個人的には、Bluestacksは非常に普及しているので、 "B"オプションをお勧めします。あなたがそれを使ってどんなトレブルに走っても、GoogleやBingで良い解決策を見つけることができます(lol).
Bluestacks.exeまたはNox.exeを正常にダウンロードした場合は、コンピュータの「ダウンロード」フォルダまたはダウンロードしたファイルを通常の場所に保存してください。
見つけたらクリックしてアプリケーションをインストールします。 それはあなたのPCでインストールプロセスを開始する必要があります。
[次へ]をクリックして、EULAライセンス契約に同意します。
アプリケーションをインストールするには画面の指示に従ってください。
上記を正しく行うと、ソフトウェアは正常にインストールされます。
これで、インストールしたエミュレータアプリケーションを開き、検索バーを見つけてください。 今度は DIY Anemometer (Wind Meter) を検索バーに表示し、[検索]を押します。 あなたは簡単にアプリを表示します。 クリック DIY Anemometer (Wind Meter)アプリケーションアイコン。 のウィンドウ。 DIY Anemometer (Wind Meter) が開き、エミュレータソフトウェアにそのアプリケーションが表示されます。 インストールボタンを押すと、アプリケーションのダウンロードが開始されます。 今私達はすべて終わった。
次に、「すべてのアプリ」アイコンが表示されます。
をクリックすると、インストールされているすべてのアプリケーションを含むページが表示されます。
あなたは アイコンをクリックします。 それをクリックし、アプリケーションの使用を開始します。
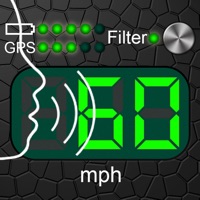
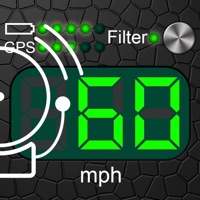
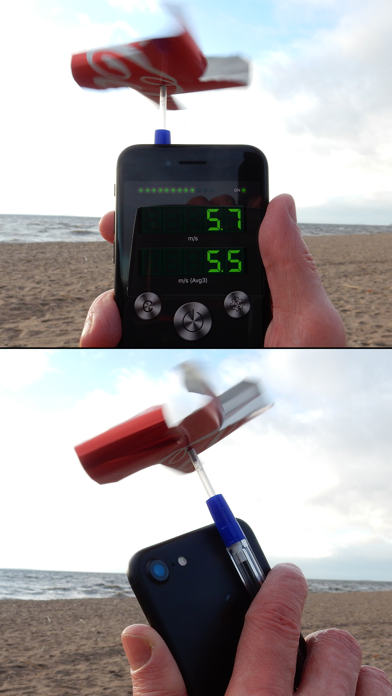
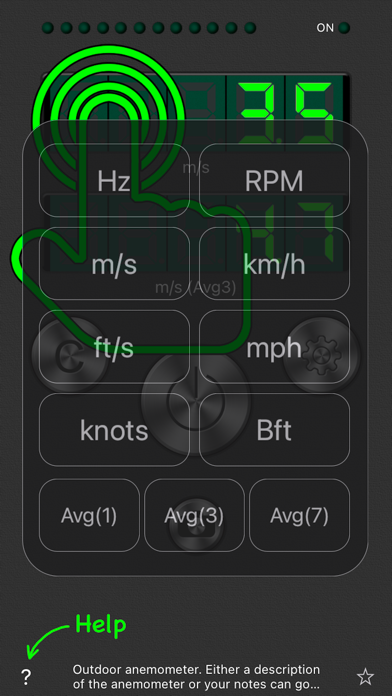
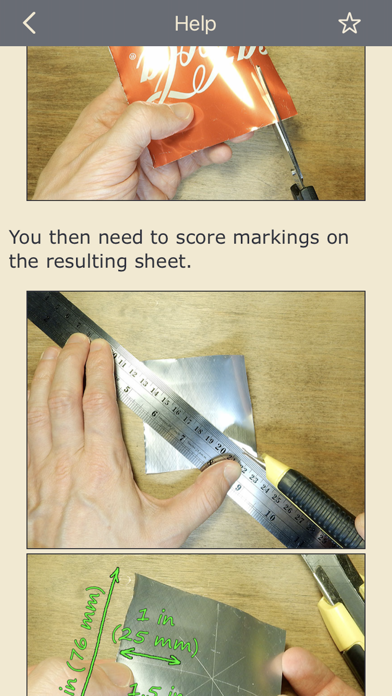
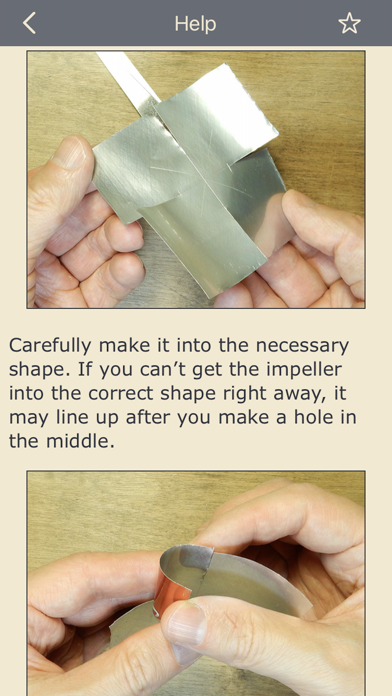
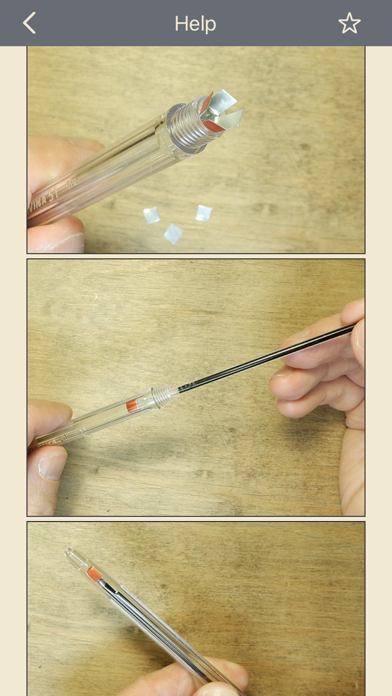
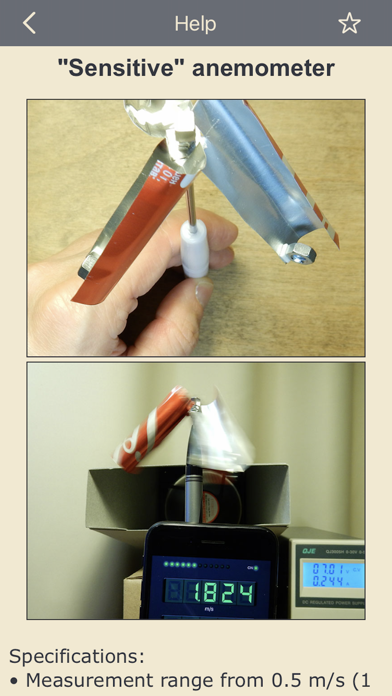
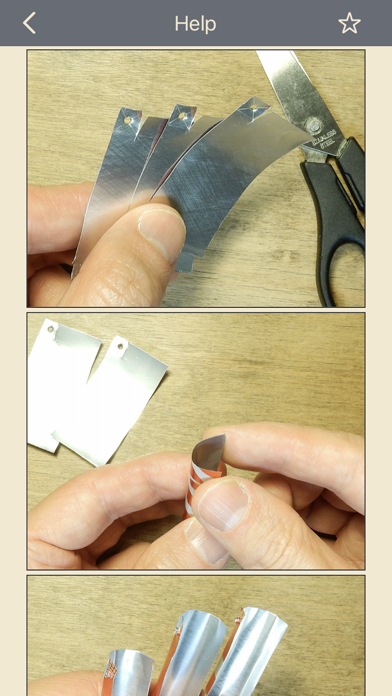
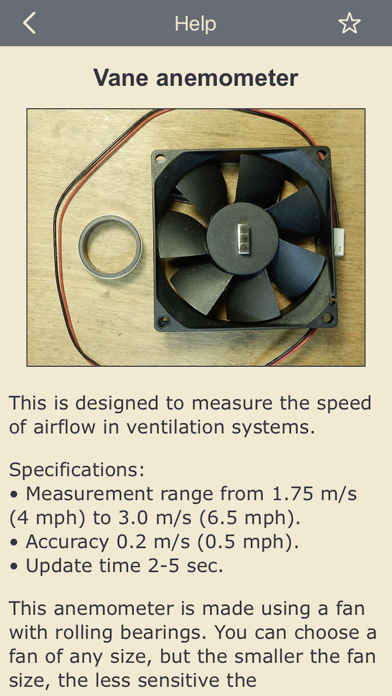
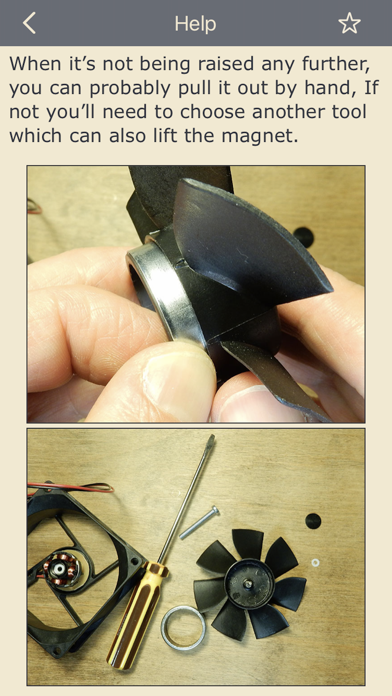
Using this app along with a very simple homemade device, you’ll have a working anemometer for measuring wind speed or the airflow in a ventilation system. You can choose the type of anemometer which best suits your needs. The wind speed is determined by measuring the rotation speed of the magnet in your iPhone’s magnetometer. The relationship between the rotation speed and the speed of airflow is set in each version of the anemometer and can be adjusted. You can make improvements to the suggested designs or make and calibrate your own. In order to select units of measurement (m/s, km/h, ft/s, mph, knots, Bft) or the average value ("Avg1" - most recent value, "Avg3" and "Avg7" - average value) press the seven-segment display. Don’t forget to put a protective cover on your iPhone. Specifications ("Outdoor" anemometer): • Measurement range from 0.5 m/s (1 mph) to 15 m/s (34 mph). • Accuracy 0.5 m/s (1 mph). • Update time 2-5 sec. IMPORTANT!!! Small children should not be given magnets because they may swallow them. If two (or more) magnets are swallowed, the magnets can become magnetized to each other in the intestines, squeezing the intestinal tissues between themselves. This can result in serious injury and hospitalization. Children who already think well (and do not swallow everything in a row) can be given only one magnet, and if the magnet is gone, then you definitely need to find a magnet. Telling children not to swallow magnets is probably not necessary, as this can lead to the opposite result. For more information, see the Help section in the app.