
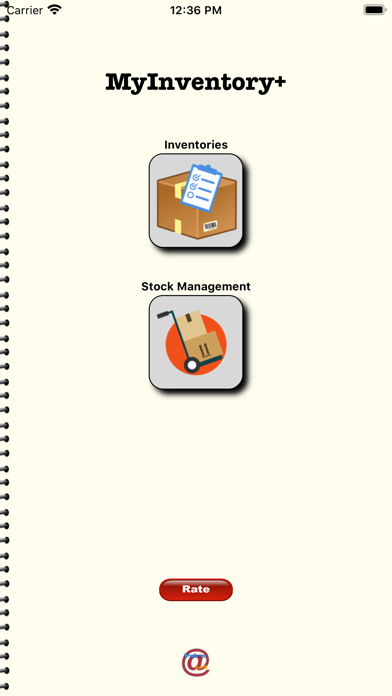
MyInventory+ - パソコン用
バイ Paulo Correia
- カテゴリ: Productivity
- 最終更新日: 2021-09-21
- 現在のバージョン: 2.1
- ファイルサイズ: 4.89 MB
- 互換性: Windows PC 10, 8, 7 + MAC
バイ Paulo Correia
あなたのWindowsコンピュータで MyInventory+ を使用するのは実際にはとても簡単ですが、このプロセスを初めてお使いの場合は、以下の手順に注意する必要があります。 これは、お使いのコンピュータ用のDesktop Appエミュレータをダウンロードしてインストールする必要があるためです。 以下の4つの簡単な手順で、MyInventory+ をコンピュータにダウンロードしてインストールすることができます:
エミュレータの重要性は、あなたのコンピュータにアンドロイド環境をエミュレートまたはイミテーションすることで、アンドロイドを実行する電話を購入することなくPCの快適さからアンドロイドアプリを簡単にインストールして実行できることです。 誰があなたは両方の世界を楽しむことができないと言いますか? まず、スペースの上にある犬の上に作られたエミュレータアプリをダウンロードすることができます。
A. Nox App または
B. Bluestacks App 。
個人的には、Bluestacksは非常に普及しているので、 "B"オプションをお勧めします。あなたがそれを使ってどんなトレブルに走っても、GoogleやBingで良い解決策を見つけることができます(lol).
Bluestacks.exeまたはNox.exeを正常にダウンロードした場合は、コンピュータの「ダウンロード」フォルダまたはダウンロードしたファイルを通常の場所に保存してください。
見つけたらクリックしてアプリケーションをインストールします。 それはあなたのPCでインストールプロセスを開始する必要があります。
[次へ]をクリックして、EULAライセンス契約に同意します。
アプリケーションをインストールするには画面の指示に従ってください。
上記を正しく行うと、ソフトウェアは正常にインストールされます。
これで、インストールしたエミュレータアプリケーションを開き、検索バーを見つけてください。 今度は MyInventory+ を検索バーに表示し、[検索]を押します。 あなたは簡単にアプリを表示します。 クリック MyInventory+アプリケーションアイコン。 のウィンドウ。 MyInventory+ が開き、エミュレータソフトウェアにそのアプリケーションが表示されます。 インストールボタンを押すと、アプリケーションのダウンロードが開始されます。 今私達はすべて終わった。
次に、「すべてのアプリ」アイコンが表示されます。
をクリックすると、インストールされているすべてのアプリケーションを含むページが表示されます。
あなたは アイコンをクリックします。 それをクリックし、アプリケーションの使用を開始します。
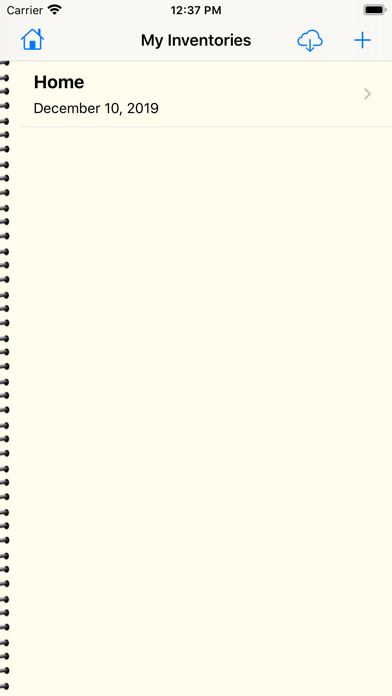
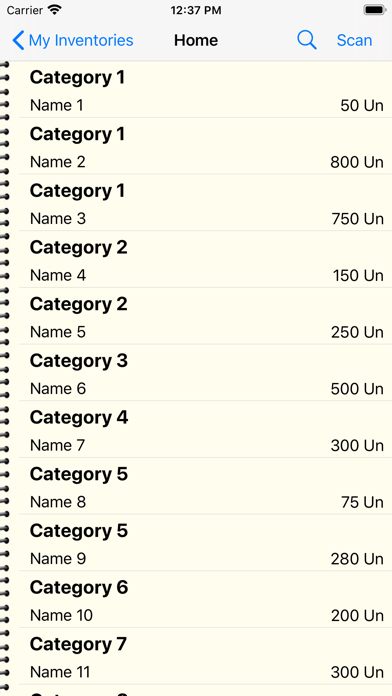
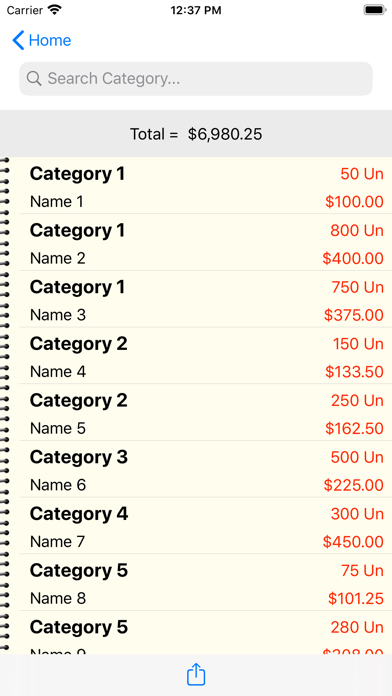
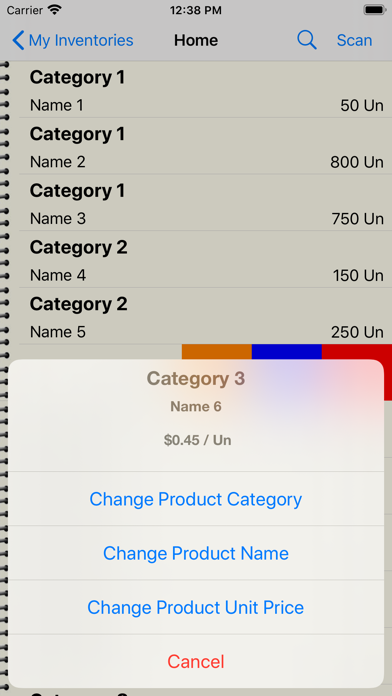
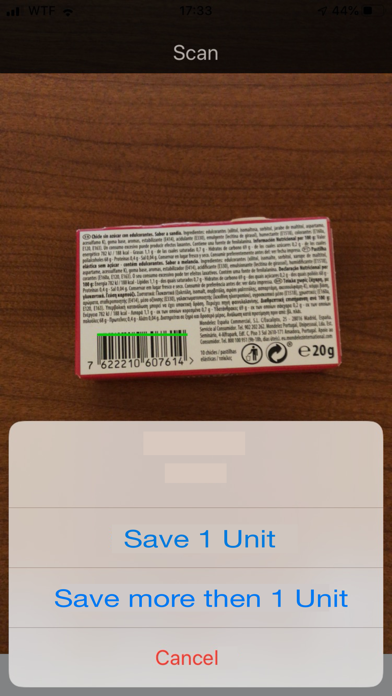
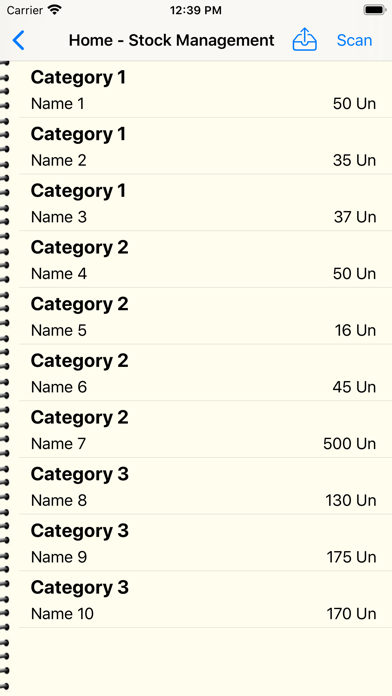
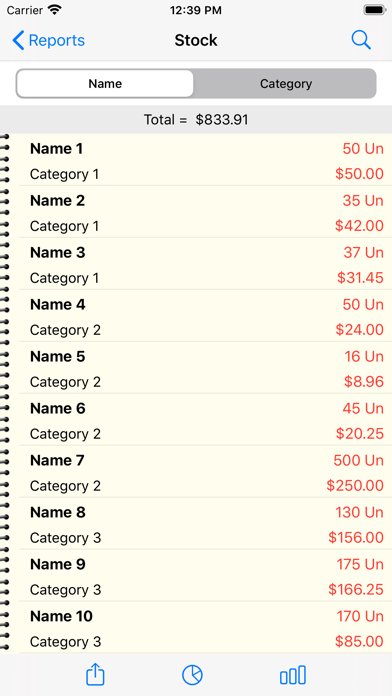
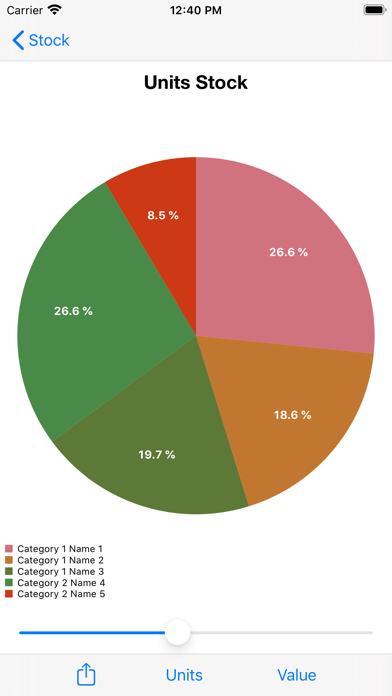
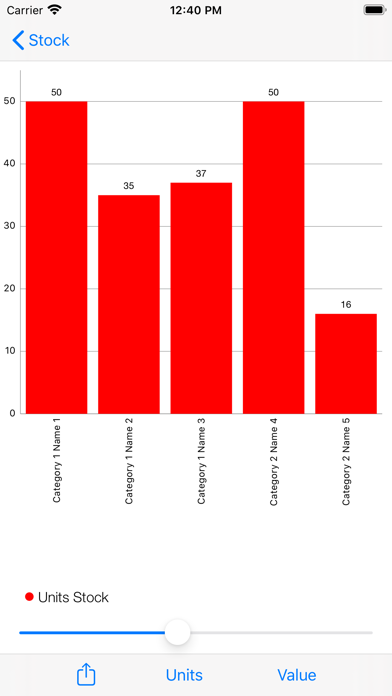
Build and manage your inventories simply and efficiently with MyInventory+ by simply scanning the product barcode, or entering the code manually. You can create the inventories you want by giving a name and a date, and start scanning your products. You can enter the quantity and its unit price, as well as the name of the product. If you re-scan a product, and it already exists in inventory, simply add the new quantity. MyInventory+ allows you to see in real time the total value of the inventory, as well as the quantities of a given product and its total value. You can filter the data to see the total inventory value for a given product category. MyInventory+ allows you to save your inventory, in CSV format, in the Files folder, as well as upload previously saved inventories. So you can import your inventory to any other device and continue your work, or simply view the older inventories. Because MyInventory+ saves the files in CSV format, they can be opened and edited, either in Pages or in Excel. MyInventory+ also allows you to send your inventory directly by E-mail or by Message, or save in Notes. After you create your Inventory, MyInventory+ allows you to manage it. Simply upload a CSV file with your previously created Inventory. You can check out existing products or check in new products. Just read or manually enter your product barcode, and MyInventory+ keeps your stock up to date, both in quantities and in value. With MyInventory+ you can always know which quantities and values are in stock, as well as the quantities and values entered and left. You can also filter by Category or Product Name. You can also export your stock management to the CSV format Files folder for viewing on your computer, or import to another device.