
Video To Photo Plus - パソコン用
- カテゴリ: Photo & Video
- 最終更新日: 2021-08-05
- 現在のバージョン: 1.0
- ファイルサイズ: 9.52 MB
- 互換性: Windows PC 10, 8, 7 + MAC


あなたのWindowsコンピュータで Video To Photo Plus を使用するのは実際にはとても簡単ですが、このプロセスを初めてお使いの場合は、以下の手順に注意する必要があります。 これは、お使いのコンピュータ用のDesktop Appエミュレータをダウンロードしてインストールする必要があるためです。 以下の4つの簡単な手順で、Video To Photo Plus をコンピュータにダウンロードしてインストールすることができます:
エミュレータの重要性は、あなたのコンピュータにアンドロイド環境をエミュレートまたはイミテーションすることで、アンドロイドを実行する電話を購入することなくPCの快適さからアンドロイドアプリを簡単にインストールして実行できることです。 誰があなたは両方の世界を楽しむことができないと言いますか? まず、スペースの上にある犬の上に作られたエミュレータアプリをダウンロードすることができます。
A. Nox App または
B. Bluestacks App 。
個人的には、Bluestacksは非常に普及しているので、 "B"オプションをお勧めします。あなたがそれを使ってどんなトレブルに走っても、GoogleやBingで良い解決策を見つけることができます(lol).
Bluestacks.exeまたはNox.exeを正常にダウンロードした場合は、コンピュータの「ダウンロード」フォルダまたはダウンロードしたファイルを通常の場所に保存してください。
見つけたらクリックしてアプリケーションをインストールします。 それはあなたのPCでインストールプロセスを開始する必要があります。
[次へ]をクリックして、EULAライセンス契約に同意します。
アプリケーションをインストールするには画面の指示に従ってください。
上記を正しく行うと、ソフトウェアは正常にインストールされます。
これで、インストールしたエミュレータアプリケーションを開き、検索バーを見つけてください。 今度は Video To Photo Plus を検索バーに表示し、[検索]を押します。 あなたは簡単にアプリを表示します。 クリック Video To Photo Plusアプリケーションアイコン。 のウィンドウ。 Video To Photo Plus が開き、エミュレータソフトウェアにそのアプリケーションが表示されます。 インストールボタンを押すと、アプリケーションのダウンロードが開始されます。 今私達はすべて終わった。
次に、「すべてのアプリ」アイコンが表示されます。
をクリックすると、インストールされているすべてのアプリケーションを含むページが表示されます。
あなたは アイコンをクリックします。 それをクリックし、アプリケーションの使用を開始します。
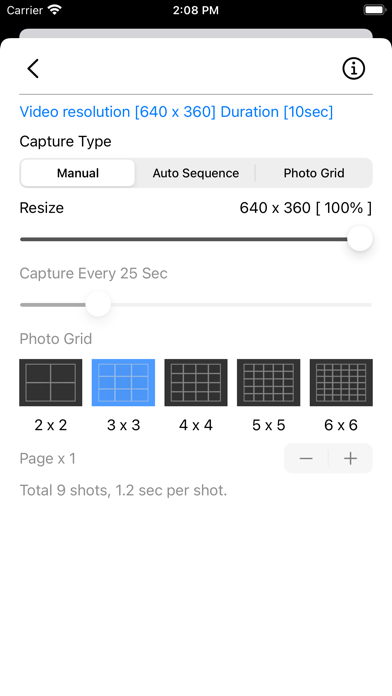
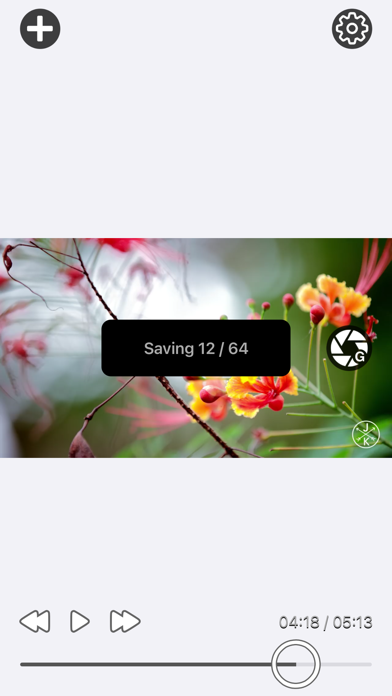
Video to Photo Plus extract frames from video files to photo with one tap. It is an ideal tool to make photo galleries from your home video. Take screenshot in easy and fast way. Features: • Preview video and able to pause for capture convenience. • Play, fast-forward or backward for frame seeking. • Frame slider for frame seeking. • Load video and capture to save photo. • Set automatically capture base on time interval. • Set time interval in between 1 second to 120 second. • Able to resize capture frames. • Set photo grid mode will present the capture photo into storyboard. • Photo grid mode 2x2, 3x3, 4x4, 5x5, 6x6 available. • Photo grid pages range from 1 to 10. • Supported both portrait and landscape mode. • All capture photos will automatically save into Cameraroll. How to Use: 1. Press the [ + ] Plus button and load video from library. 2. You can preview the video as option. 3. Select manual or sequence mode in setting panel. -- Manual Mode -- 4. Use the time slider to seek for frame you want to capture. 5. Capture the image manually by pressing the capture button. 6. The capture photo will automatically save into Cameraroll. -- Auto Sequance Mode -- 4. Set the time interval you desire. 5. Press the capture button and all frames will be automatically save into Cameraroll. For automatic capture mode, you can set frame interval for example 5 second. Video to Photo Plus will automatically capture frame every 5 second until the clip end and all capture photos will save into Camera roll automatically. -- Photo Grid Mode -- 6. Set how many photos to fix in 1 page. 7. Set number of pages require. 8. Will show summary on how many frame shot require and time interval between each shot. 9. Press the capture button and Photo Grid will be automatically save into Cameraroll. Thanks for your support and do visit nitrio.com for more apps for your iOS devices.