
4Memo - パソコン用
- カテゴリ: Productivity
- 最終更新日: 2023-01-23
- 現在のバージョン: 2.1
- ファイルサイズ: 849.00 kB
- 互換性: Windows PC 10, 8, 7 + MAC


あなたのWindowsコンピュータで 4Memo を使用するのは実際にはとても簡単ですが、このプロセスを初めてお使いの場合は、以下の手順に注意する必要があります。 これは、お使いのコンピュータ用のDesktop Appエミュレータをダウンロードしてインストールする必要があるためです。 以下の4つの簡単な手順で、4Memo をコンピュータにダウンロードしてインストールすることができます:
エミュレータの重要性は、あなたのコンピュータにアンドロイド環境をエミュレートまたはイミテーションすることで、アンドロイドを実行する電話を購入することなくPCの快適さからアンドロイドアプリを簡単にインストールして実行できることです。 誰があなたは両方の世界を楽しむことができないと言いますか? まず、スペースの上にある犬の上に作られたエミュレータアプリをダウンロードすることができます。
A. Nox App または
B. Bluestacks App 。
個人的には、Bluestacksは非常に普及しているので、 "B"オプションをお勧めします。あなたがそれを使ってどんなトレブルに走っても、GoogleやBingで良い解決策を見つけることができます(lol).
Bluestacks.exeまたはNox.exeを正常にダウンロードした場合は、コンピュータの「ダウンロード」フォルダまたはダウンロードしたファイルを通常の場所に保存してください。
見つけたらクリックしてアプリケーションをインストールします。 それはあなたのPCでインストールプロセスを開始する必要があります。
[次へ]をクリックして、EULAライセンス契約に同意します。
アプリケーションをインストールするには画面の指示に従ってください。
上記を正しく行うと、ソフトウェアは正常にインストールされます。
これで、インストールしたエミュレータアプリケーションを開き、検索バーを見つけてください。 今度は 4Memo を検索バーに表示し、[検索]を押します。 あなたは簡単にアプリを表示します。 クリック 4Memoアプリケーションアイコン。 のウィンドウ。 4Memo が開き、エミュレータソフトウェアにそのアプリケーションが表示されます。 インストールボタンを押すと、アプリケーションのダウンロードが開始されます。 今私達はすべて終わった。
次に、「すべてのアプリ」アイコンが表示されます。
をクリックすると、インストールされているすべてのアプリケーションを含むページが表示されます。
あなたは アイコンをクリックします。 それをクリックし、アプリケーションの使用を開始します。
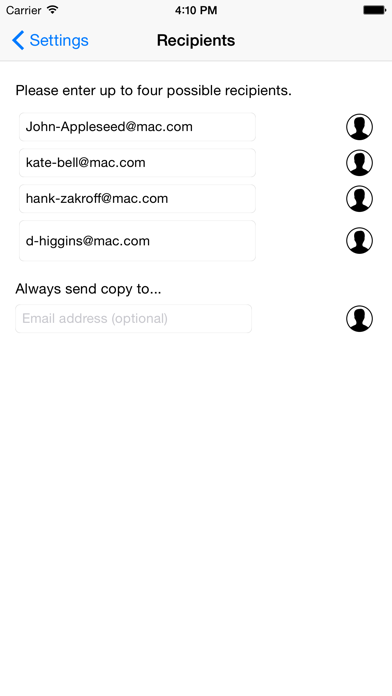
Recording and sending voice memos made easy! Voice memos are a great way to quickly capture some ideas and send them to your own or someone else's mailbox. Unfortunately this usually requires a lot of steps until you are done. Until now. 4Memo provides you with a workflow that uses the least possible steps in order to record a voice memo and send it to whoever you want. Just enter up to four recipients to which you can send your voice memo as quick as possible. Those recipients will appear as big, easy-to-hit buttons on the app's main screen. After recording your memo, just hit the respective contact button and your voice memo will be attached to a prepopulated, ready-to-send email. Just on more tap on "Send" and your message is on its way. On iPhone 6s and iPhone 6s Plus you can even start a recording right from your home screen, thanks to 3D Touch. We developed 4Memo with your privacy in mind. Therefore, there is no data transmitted to our servers nor is it in any other way processed on your device. The recording and processing of your voice memo is completely and solely done on your iPhone. The email is sent via the mail account which is configured on your device. This means that it is sent solely through the servers of the email provider of your choice, just like any other email that you send through the iPhone's mail app. This makes the final tap on "Send" necessary but it also asures you that all your data stays in your hands all the time.